
# Vue 插件开发,Element Plus、VantUI 组件库实践应用
TIP
本章节我们来学习如何开发 Vue 插件及使用第三方插件库(比如:VantUI 和 Element plus)。
- Vue 插件开发,使用、功能范围
- 星级评分插件开发
- Element Plus 组件库
- Vant UI 组件库
# 一、Vue 插件开发
TIP
本小节我们将学习如何定义一个插件,如何使用插件、插件能实现的功能范围。
# 1、Vue 插件介绍
TIP
插件(Plugins)是一种能为 Vue 添加全局功能的工具代码。
- 一个插件可以是一个拥有
install()方法的对象
export const myPlugin = {
  /*
        app 为当前安装插件的应用实例对象,调用use方法app对象
        options 为传递给插件的可选配置项,传递给app.use方法的第二个参数
     */
  install(app, options) {
    // 这里编写插件代码
  },
};
- 一个插件可以是一个安装函数本身
/*
    app 为当前安装插件的应用实例对象
    options 为传递给插件的配置选项
*/
export function myPlugin(app, options) {
  // 这里编写插件代码
}
# 2、插件的使用
TIP
在 Vue 中可以在src/main.js文件中通过调用app.use()来注册插件。
import { createApp } from "vue";
// 导入插件
import { myPlugin } from "./plugin/myPlugin.js";
const app = createApp(App);

// 注册插件
app.use(myPlugin, {
  /* 可选的插件配置选项 */
});
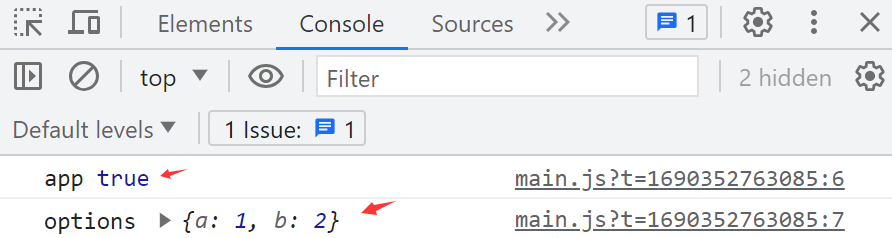
如果myPlugin插件是一个带有install方法的对象,调用app.use(myPlugin,options)注册插件时,内部会调用myPlugin对象的install方法,并将app和options作为参数传递给install方法。
import { createApp } from "vue";
import App from "./App.vue";

const app1 = createApp(App);
// 定义插件
const myPlugin = {
  install(app, options) {
    console.log("app", app === app1); // true
    console.log("options", options); // {a:1,b:2}
  },
};

// 注册插件
app1.use(myPlugin, {
  a: 1,
  b: 2,
});

app1.mount("#app");
当启动应用时,最终在控制台输出如下结果
如果myPlugin插件是一个函数,调用app.use(myPlugin,options)注册插件时,会将app和options作为参数传递函数。
import { createApp } from "vue";
import App from "./App.vue";
const app1 = createApp(App);

// 定义插件
function myPlugin(app, options) {
  console.log("app", app === app1);
  console.log("options", options);
}
// 注册插件
app1.use(myPlugin, {
  a: 1,
  b: 2,
});
app1.mount("#app");
当启动应用时,最终在控制台输出如下结果
# 3、插件的功能范围
TIP
插件没有严格定义的使用范围,但是插件发挥作用的常见场景主要包括以下几种:
- ①、通过 app.component() (opens new window) 和 app.directive() (opens new window) 注册一到多个全局组件或全局自定义指令。
- ②、通过 app.provide() (opens new window) 使一个资源可被注入进整个应用。
- ③、向 app.config.globalProperties (opens new window) 中添加一些全局实例属性或方法
- ④、一个可能上述三种都包含了的功能库(例如 vue-router (opens new window))
代码示例
在src/plugin/myPlugin.js中定义插件
import { h, reactive } from "vue";
// 导入(前2节课讲的Message组件)   导入 ../components/Message/index.js
import Message from "../components/Message";
// 默认导出插件对象
export default {
  install(app, options) {
    // 添加全局组件
    app.component("my-component", {
      render() {
        return h("h3", "Hello Vue3!!");
      },
    });

    // 添加全局指令
    app.directive("display", (el, binding) => {
      if (binding.value) {
        el.style.display = "block";
      } else {
        el.style.display = "none";
      }
    });

    // 添加全局依赖
    app.provide(
      "userInfo",
      reactive({
        username: "清心",
        age: 34,
        identity: "管理员",
      })
    );

    // 添加全局属性或方法
    // 这种方式提供的全局变量,不推荐在setup() 和 <script setup>中访问
    // 可以把全局变量通过provide来提供,然后再通过inject来注入
    app.config.globalProperties.$message = Message;
  },
};
注册插件
在src/main.js文件中注册插件
import { createApp } from "vue";
import App from "./App.vue";
// 导入插件
import myPlugin from "./plugin/myPlugin.js";

const app = createApp(App);
// 注册插件
app.use(myPlugin);
app.mount("#app");
使用插件提供的功能
在src/app.vue中使用插件提供的全局组件、全局指令、全局依赖、全局方法
<script setup>
  import { inject, getCurrentInstance } from "vue";
  // 注入提供的依赖
  const userInfo = inject("userInfo");
  // 以下方式可以获取到全局变量,但不推荐这样使用
  /*
        const instance = getCurrentInstance()
        console.log(instance.proxy)
        function submit() {
            instance.proxy.$message.success({ message: '提交成功' })
        }
	*/
</script>

<template>
  <!-- 使用全局组件 -->
  <my-component></my-component>

  <!-- 使用全局指令 -->
  <div v-display="true">显示</div>
  <div v-display="false">隐藏</div>
  <hr />

  <!-- 使用全局注入-->
  <div>用户名:{{ userInfo.username }}</div>
  <div>用户类型:{{ userInfo.identity }}</div>

  <!-- 使用全局方法 -->
  <button @click="$message.success({ message: '提交成功' })">提交</button>
</template>
最终渲染后效果如下,点击提交按扭,会显示提交成功提示框
# 二、星级评分插件
TIP
本小节我们一起来开发《星级评分》插件,Rate星级评分组件使用方法
<script setup>
  import { ref } from "vue";
  const score = ref(4);
</script>
<template>
  <Rate :size="40" v-model="score"></Rate>
</template>
最终渲染出效果如下:

# 1、开发流程
TIP
- 开发 Rate 组件
- 将 Rate 组件做成插件
- 注册插件
- 使用 Rate 组件
# 2、开发 Rate 组件
利用阿里
iconfont图标来绘制星星
src/components/Rate/Rate.vue组件内容如下:
<template>
  <div class="rate">
    <span class="iconfont icon-star star"></span>
  </div>
</template>
<style scoped>
  @font-face {
    font-family: "iconfont";
    /* Project id 4186612 */
    src: url("//at.alicdn.com/t/c/font_4186612_6tkc3n3cd7r.woff2?t=1690529927523")
        format("woff2"), url("//at.alicdn.com/t/c/font_4186612_6tkc3n3cd7r.woff?t=1690529927523")
        format("woff"),
      url("//at.alicdn.com/t/c/font_4186612_6tkc3n3cd7r.ttf?t=1690529927523")
        format("truetype");
  }

  .iconfont {
    font-family: "iconfont" !important;
    font-size: 16px;
    font-style: normal;
    -webkit-font-smoothing: antialiased;
    -moz-osx-font-smoothing: grayscale;
  }

  .icon-star:before {
    content: "\e627";
  }

  .star {
    color: #ddd;
  }
</style>
利用
v-for='starNum in 5'循环遍历得到 5 颗星星
<div class="rate">
  <span v-for="starNum in 5" :key="starNum" class="iconfont icon-star star">
  </span>
</div>
设置变量
score保存当前选中星星数量(即:当前评分),并通过动态绑定 class 实现选中星星为红色
<script setup>
  import { ref } from "vue";
  // 当前评分(选中星星数)
  const score = ref(3);
</script>

<template>
  <div class="rate">
    <span
      v-for="starNum in 5"
      :key="starNum"
      class="iconfont icon-star star"
      :class="{ active: starNum <= score ? true : false }"
    ></span>
  </div>
</template>

<style scoped>
  /* ..... */
  .star.active {
    color: red;
  }
</style>
- 点击对应星星时,实现评分效果

<script setup>
  import { ref } from "vue";
  // 当前评分(选中星星数)
  const score = ref(3);
  // 设置评分
  function setScore(starNum) {
    score.value = starNum;
  }
</script>
<template>
  <div class="rate">
    <span
      v-for="starNum in 5"
      :key="starNum"
      class="iconfont icon-star star"
      :class="{ active: starNum <= score ? true : false }"
      @click="setScore(starNum)"
    ></span>
  </div>
</template>
<style scoped>
  @font-face {
    font-family: "iconfont";
    /* Project id 4186612 */
    src: url("//at.alicdn.com/t/c/font_4186612_6tkc3n3cd7r.woff2?t=1690529927523")
        format("woff2"), url("//at.alicdn.com/t/c/font_4186612_6tkc3n3cd7r.woff?t=1690529927523")
        format("woff"),
      url("//at.alicdn.com/t/c/font_4186612_6tkc3n3cd7r.ttf?t=1690529927523")
        format("truetype");
  }

  .iconfont {
    font-family: "iconfont" !important;
    font-size: 16px;
    font-style: normal;
    -webkit-font-smoothing: antialiased;
    -moz-osx-font-smoothing: grayscale;
  }

  .icon-star:before {
    content: "\e627";
  }

  .star {
    color: #ddd;
  }

  .star.active {
    color: red;
  }
</style>
- 在使用
Rate组件时,可以通过sizeprop 来设置星星的大小,同时在使用Rate组件时可以得到当前被选中的星星数(评分 score) - 我们可以给
Rate组件监听@getScore=getScore事件,当点击星星时触发 getScore 事件,事件触发时会调getScore方法,在该方法内部可以拿到当前被选中的星星数(评分 score)
<script setup>
  import Rate from "./components/Rate/Rate.vue";

  function getScore(value) {
    // value值为当前评分(选中星星数量)
    console.log(value);
  }
</script>
<template>
  <Rate :size="40" @getScore="getScore"></Rate>
</template>
<!--Rate.vue组件 -->
<script setup>
  import { computed, ref } from "vue";
  // 声明按受的props
  const props = defineProps(["size"]);
  // 声明监听的事件
  const emit = defineEmits(["getScore"]);

  // 计算属性,得到当前星星的大小 40px
  const fontSize = computed(() => props.size + "px");

  // 当前评分(选中星星数)
  const score = ref(3);
  // 设置评分
  function setScore(starNum) {
    score.value = starNum;
    emit("getScore", starNum);
  }
</script>

<style scoped>
  .star {
    color: #ddd;
    font-size: v-bind(fontSize); /* 根据size的计算属性设置字体大小*/
  }
</style>
- 如果用户想在使用
Rate组件时,能初始化当前被选中的星星数,则可以给Rate组件传递scoreprop - 然后 Rate 组件中接受该 prop
<!--Rate.vue-->
<script setup>
  import { computed, ref } from "vue";
  // 声明按受的props
  const props = defineProps(["size", "score"]);
  // 声明监听的事件
  const emit = defineEmits(["getScore"]);

  // 计算属性,得到当前星星的大小 40px
  const fontSize = computed(() => props.size + "px");

  // 当前评分(选中星星数)
  // const score = ref(3);
  // 设置评分
  function setScore(starNum) {
    // score.value = starNum  不能通过这种方式设置score prop的值
    emit("getScore", starNum);
  }
</script>
<!--App.vue-->
<script setup>
  import Rate from "./components/Rate/Rate.vue";
  import { ref } from "vue";
  const score = ref(4);

  function getScore(value) {
    // value值为当前评分(选中星星数量)
    console.log(value);
    score.value = value; // 修改 score的值
  }
</script>
<template>
  <Rate :size="40" @getScore="getScore" :score="score"></Rate>
</template>
代码优化
我们可以将 @getScore="getScore"事件监听与 :score="score"prop 简写成v-model='score'
- App.vue
<script setup>
  import Rate from "./components/Rate/Rate.vue";
  import { ref } from "vue";
  const score = ref(4);
</script>
<template>
  <Rate :size="40" v-model="score"></Rate>
</template>
- Rate.vue 组件
<script setup>
  import { computed, ref } from "vue";
  // 声明按受的props
  const props = defineProps(["size", "modelValue"]);
  // 声明监听的事件
  const emit = defineEmits(["update:modelValue"]);

  // 计算属性,得到当前星星的大小 40px
  const fontSize = computed(() => props.size + "px");

  // 当前评分(选中星星数)
  // const score = ref(3);
  // 设置评分
  function setScore(starNum) {
    // score.value = starNum
    emit("update:modelValue", starNum);
  }
</script>
<template>
  <div class="rate">
    <span
      v-for="starNum in 5"
      :key="starNum"
      class="iconfont icon-star star"
      :class="{ active: starNum <= modelValue ? true : false }"
      @click="setScore(starNum)"
    ></span>
  </div>
</template>
# 2.1、Rate 组件最终版
<script setup>
  import { computed, ref } from "vue";
  // 声明按受的props
  const props = defineProps(["size", "modelValue"]);
  // 声明监听的事件
  const emit = defineEmits(["update:modelValue"]);

  // 计算属性,得到当前星星的大小 40px
  const fontSize = computed(() => props.size + "px");

  // 设置评分
  function setScore(starNum) {
    // 触发事件,修改评分值
    emit("update:modelValue", starNum);
  }
</script>

<template>
  <div class="rate">
    <span
      v-for="starNum in 5"
      :key="starNum"
      class="iconfont icon-star star"
      :class="{ active: starNum <= modelValue ? true : false }"
      @click="setScore(starNum)"
    ></span>
  </div>
</template>

<style scoped>
  @font-face {
    font-family: "iconfont";
    /* Project id 4186612 */
    src: url("//at.alicdn.com/t/c/font_4186612_6tkc3n3cd7r.woff2?t=1690529927523")
        format("woff2"), url("//at.alicdn.com/t/c/font_4186612_6tkc3n3cd7r.woff?t=1690529927523")
        format("woff"),
      url("//at.alicdn.com/t/c/font_4186612_6tkc3n3cd7r.ttf?t=1690529927523")
        format("truetype");
  }

  .iconfont {
    font-family: "iconfont" !important;
    font-size: 16px;
    font-style: normal;
    -webkit-font-smoothing: antialiased;
    -moz-osx-font-smoothing: grayscale;
  }

  .icon-star:before {
    content: "\e627";
  }

  .star {
    color: #ddd;
    font-size: v-bind(fontSize);
  }

  .star.active {
    color: red;
  }
</style>
# 2.2、将组件做成插件
src/components/Rate/index.js 文件内容如下:
// 导入 Rate组件
import Rate from "./Rate.vue";
// 定义插件对象
export default {
  install(app, options) {
    // 将组件注册为全局组件
    app.component("Rate", Rate);
  },
};
# 2.3、注册插件
/src/main.js中注册插件
// 导入Rate星级评分插件
import Rate from "./components/Rate";
// ....
// 注册插件
app.use(Rate);
# 2.4、使用 Rate 组件
<script setup>
  import { ref } from "vue";
  const score = ref(4);
</script>
<template>
  <Rate :size="40" v-model="score"></Rate>
</template>
# 三、Element Plus 组件库
TIP
Element Plus (opens new window) 是基于 Vue 3,面向设计师和开发者的组件库。
Element 组件的使用有以下三种方式:
- 完整引入
- 按需导入 - 自动导入(推荐)
- 按需导入 - 手动导入
但不管那一种方式使用,都需要先执行以下命令,下载Element Plus组件库
npm install element-plus --save
# 1、完整引入
TIP
如果你对打包后的文件大小不是很在乎,那么使用完整导入会更方便
// 导入 ElementPlus
import ElementPlus from "element-plus";
// 导入组件用到的CSS
import "element-plus/dist/index.css";
// 注册组件
app.use(ElementPlus);
# 2、按需导入 - 自动导入(推荐)
TIP
根据项目中用到的 Element 组件来导入对应组件。
首先你需要安装unplugin-vue-components 和 unplugin-auto-import这两款插件
npm install -D unplugin-vue-components unplugin-auto-import
然后把下列代码插入到你的 Vite
// vite.config.ts
import { defineConfig } from "vite";
import AutoImport from "unplugin-auto-import/vite";
import Components from "unplugin-vue-components/vite";
import { ElementPlusResolver } from "unplugin-vue-components/resolvers";

export default defineConfig({
  // ...
  plugins: [
    // ...
    AutoImport({
      resolvers: [ElementPlusResolver()],
    }),
    Components({
      resolvers: [ElementPlusResolver()],
    }),
  ],
});
# 3、按需导入 - 手动导入
TIP
Element Plus 提供了基于 ES Module 的开箱即用的 Tree Shaking (opens new window) 功能。
但你需要安装 unplugin-element-plus (opens new window) 来按需引入样式
- 执行下面命令安装
unplugin-element-plus插件
npm i unplugin-element-plus -D
- 在
vite.config.js中配置插件
// vite.config.js
import { defineConfig } from "vite";
import ElementPlus from "unplugin-element-plus/vite";

export default defineConfig({
  // ...
  plugins: [ElementPlus()],
});
- 在需要使用 Element 组件的组件中,通过
import导入即可
<script setup>
  import { ElButton } from "element-plus";

  // 以上导入会自动转换如下  ↓ ↓ ↓ ↓ ↓ ↓
  // import { ElButton } from 'element-plus'
  // import 'element-plus/es/components/button/style/css'
</script>

<template>
  <el-button>Default</el-button>
  <el-button type="primary">Primary</el-button>
  <el-button type="success">Success</el-button>
  <el-button type="info">Info</el-button>
  <el-button type="warning">Warning</el-button>
  <el-button type="danger">Danger</el-button>
</template>
注意
如果使用 unplugin-element-plus 并且只使用组件 API,你需要手动导入样式。
<script>
  import "element-plus/es/components/message/style/css";
  import { ElMessage } from "element-plus";
  import { h } from "vue";

  export default {
    setup() {
      return () => h(ElMessage, { type: "success", message: "ssss" });
    },
  };
</script>
# 四、Vant 组件库
但不管那一种方式使用,都需要先执行以下命令,下载Vant组件库
npm i vant
# 1、常规用法
TIP
如果你不在乎打包后文件的大小,可以采用以下方式注册 Vant 组件。
import { createApp } from "vue";
// 1. 引入你需要的组件
import { Button, Search } from "vant";
// 2. 引入组件样式((所有组件样式))
import "vant/lib/index.css";

const app = createApp();

// 3. 注册你需要的组件
app.use(Button);
app.use(Search);
以上方式注册好 Button 组件后,就可以在其它组件模板中使用 Button 组件了。
<!--App组件中使用-->
<template>
  <div>
    <van-button type="primary">主要按钮</van-button>
    <van-button type="success">成功按钮</van-button>
    <van-button type="default">默认按钮</van-button>
    <van-button type="warning">警告按钮</van-button>
    <van-button type="danger">危险按钮</van-button>
  </div>
  <div>
    <van-search v-model="value" placeholder="请输入搜索关键词" />
  </div>
</template>

提示:
Vant 默认支持 Tree Shaking,因此你不需要配置任何插件,通过 Tree Shaking 即可移除不需要的 JS 代码,但 CSS 样式无法通过这种方式优化。
如果需要按需引入 CSS 样式,请参考下面的方法二。
# 2、按需引入(推荐)
TIP
相比于常规用法,这种方式可以按需引入组件的 CSS 样式,从而减少一部分代码体积,但使用起来会变得繁琐一些
- ①、需要安装 unplugin-vue-components (opens new window) 插件,它可以自动引入组件,并按需引入组件的样式
npm i unplugin-vue-components -D
- ②、如果是基于
vite的项目,在vite.config.js文件中配置插件
import Components from "unplugin-vue-components/vite";
import { VantResolver } from "unplugin-vue-components/resolvers";

export default {
  plugins: [
    // ...
    Components({
      resolvers: [VantResolver()],
    }),
  ],
};
- ③、完成以上两步,就可以直接在模板中使用 Vant 组件了,
unplugin-vue-components会解析模板并自动注册对应的组件
<!--App组件中使用-->
<template>
  <van-button type="primary">主要按钮</van-button>
  <van-button type="success">成功按钮</van-button>
  <van-button type="default">默认按钮</van-button>
  <van-button type="warning">警告按钮</van-button>
  <van-button type="danger">危险按钮</van-button>
</template>
注意事项
Vant 中有个别组件是以函数的形式提供的,包括 Toast,Dialog,Notify 和 ImagePreview 组件。
在使用函数组件时,unplugin-vue-components 无法自动引入对应的样式,因此需要手动引入样式。
// Toast
import { showToast } from "vant";
import "vant/es/toast/style";

// Dialog
import { showDialog } from "vant";
import "vant/es/dialog/style";

// Notify
import { showNotify } from "vant";
import "vant/es/notify/style";

// ImagePreview
import { showImagePreview } from "vant";
import "vant/es/image-preview/style";
你可以在项目的入口文件或公共模块中引入以上组件的样式,这样在业务代码中使用组件时,便不再需要重复引入样式了。
- 在 App 组件中使用 Dialog 组件
<script setup>
  import { showDialog } from "vant";
  import "vant/es/dialog/style";

  showDialog({
    message: "生命远不止连轴转和忙到极限,人类的体验远比这辽阔、丰富得多。",
    theme: "round-button",
  }).then(() => {
    // on close
  });
</script>

<template>
  <button
    @click="showDialog({
                    message: '提交成功'
                    })"
  >
    提交
  </button>
</template>
大厂最新技术学习分享群

微信扫一扫进群,获取资料
X