
# Class 类的属性、方法、继承、构造函数及解决方案
TIP
本节内容我们开始学习 ES6 中 Class 类,属性和方法,Class 的继承以及 Class 在实际开发中的应用等。
# 一、初始 Class 类
TIP
深入浅出 Class 类是什么,Class 类的由来,Class 的两种定义形式
# 1、什么是类
TIP
类可以看做是对象的模板,用一个类可以创建出许多不同的对象。
如下
| 类 | 对象 |
|---|---|
| 人 | 小明,小红,清心,arry |
| 鸟 | 麻雀、鹦鹉、鸽子、燕子、画眉 |
| 狗 | 柴犬、法斗、英斗、拉布拉多、边牧 |
# 2、Class 类的由来
TIP
JavaScript 语言中,生成实例对象的传统方法是通过构造函数。
如下
function Point(x, y) {
  this.x = x;
  this.y = y;
}

Point.prototype.toString = function () {
  console.log(`(${this.x},${this.y})`);
};
let point = new Point(1, 2);
point.toString(); // (1,2)
上面这种写法跟传统的面向对象语言(比如 C++ 和 Java)差异很大,很容易让新学习这门语言的程序员感到困惑。
TIP
ES6 提供了更接近传统语言的写法,引入了 Class(类)这个概念,作为对象的模板。通过class关键字,可以定义类。
基本上,ES6 的class可以看作只是一个语法糖,它的绝大部分功能,ES5 都可以做到,新的class写法只是让对象原型的写法更加清晰、更像面向对象编程的语法而已。
上面的代码用 ES6 的
class改写,就是下面这样。
// 定义一个Point 类
class Point {
  constructor(x, y) {
    this.x = x;
    this.y = y;
  }
  toString() {
    console.log(`(${this.x},${this.y})`);
  }
}
let point = new Point(1, 2);
point.toString(); // (1,2)
上面代码定义了一个“类”,可以看到里面有一个constructor()方法,这就是构造方法,内部的this关键字则代表实例对象。这种新的 Class 写法,本质上与本章开头的 ES5 的构造函数Point是一致的。
Point类除了构造方法,还定义了一个toString()方法。
注意
定义”类“的方法时,前面不需要加上function这个关键字,直接把函数定义放进去了就可以了。
另外,方法与方法之间不需要逗号分隔,加了会报错。
ES6 的类,完全可以看作构造函数的另一种写法。
# 3、Class 类的基本用法
语法
// 类的声明是 class + 类名{}
// class 是关键字
// Person 是类名一般首字母大写
class Person {}
基本用法
class Person {
constructor(username, age) {
// console.log("例化时,执行构造方法");
// 当前的 this 表示 new Person() 实例化生成的对象 qxin
// 我们给 this 添加属性就相当于给 arry 对象添加
this.username = username;
this.age = age;
// 注意:一般在构造方法中定义属性,不会定义方法,即以下写法会造成方法不能共享
this.eat = () => {};
}
}
// 实例化 qxin 对象
const qxin = new Person("清心", 19);
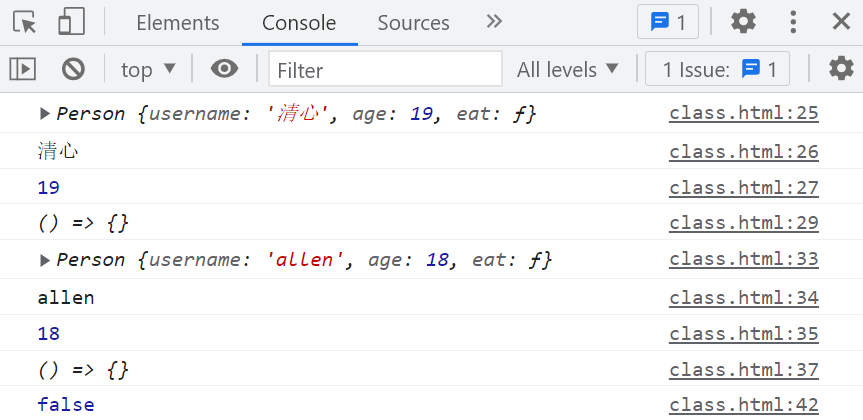
console.log(qxin); // Person {username: '清心', age: 19, eat: ƒ}
console.log(qxin.username); // 清心
console.log(qxin.age); // 19
// 调用方法
console.log(qxin.eat); // () => {}
// 实例化 allen 对象
const allen = new Person("allen", 18);
console.log(allen); // Person {username: 'allen', age: 18, eat: ƒ}
console.log(allen.username); // allen
console.log(allen.age); // 18
// 调用方法
console.log(allen.eat); // () => {}
// arry对象和allen对象的 eat 方法不相等
// 说明它们不是同一个引用,会在内存中开辟不同的空间来存储,每new一个新的对象就会多开辟一个空间
// 非常浪费资源和消耗内存的,严重影响性能,因此一般方法不在构造方法中定义,最好是方法能够共用,避免造成浪费
console.log(allen.eat === qxin.eat); // false
在 Class 定义各个实例共享的方法
class Person {
  constructor(username, age) {
    this.username = age;
    this.age = age;
  }

  // 各实例共享的方法
  eat() {
    console.log("Eat apples");
  }
}

const qxin = new Person("清心", 19);
// 调用方法
qxin.eat(); // Eat apples
const allen = new Person("allen", 18);
// 调用方法
allen.eat(); // Eat apples

// arry对象和allen对象的 eat 方法 此时就是相等的,即同一个引用
console.log(qxin.eat === allen.eat); // true
以上 ES6 的类,完全可以看作传统构造函数的另一种写法。如下
function Person(username, age) {
  this.username = username;
  this.age = age;

  // 注意:同理,一般只会在构造函数中定义属性,方法不在构造函数中定义
  // this.eat = () => {};
}

Person.prototype.eat = function () {};
类的数据类型就是函数,类本身就指向构造函数。写在 Class 类内部的方法,本质就是写在构造函数的原型上
class Person {
  constructor(username, age) {
    this.username = age;
    this.age = age;
  }

  eat() {
    console.log("Eat apples");
  }
}

// 通过以下类型判断和对比看到,类的数据类型就是函数,类本身就指向构造函数。
console.log(typeof Person); // function
console.log(Person === Person.prototype.constructor); // true
// 同样可以在 Person 的原型对象上找到 eat 方法
console.log(Person.prototype.eat);
# 4、constructor 方法
TIP
constructor 方法是类的默认方法,通过 new 关键字生成对象实例时会自动调用该方法。
一个类必需有 constructor 方法,如果没有显示定义,则会默认添加的一个空的 constructor 方法
class Point {}

// 等同于
class Point {
  constructor() {}
}
注:
- constructor 方法默认返回实例对象(即 this),不过可以人为指定返回一个新对象
- 如果 constructor 的返回值人为指定非引用数据类型,则其返回值采用默认值(实例对象)
class Point {
  constructor(x, y) {
    this.x = x;
    this.y = y;
    return [1, 2, 3]; // new Point()后返回值为 该数组
    //  return function () {};   // new Point()后,返回值为该函数
  }
}

const point = new Point(2, 2);
console.log(point); // [1, 2, 3]
class Point {
  constructor(x, y) {
    this.x = x;
    this.y = y;
    return 12; // 不起作用,new Point()后,默认返回实例对象
  }
}

const point = new Point(2, 2);
console.log(point); // Point {x: 2, y: 2}
# 5、Class 的两种写法
TIP
- 声明形式(重点学习这个)也是最常用的,以上讲的就是
- 表达式形式(了解即可)
Class 的声明形式
class Person {
  // 构造方法
  constructor() {}

  // 自定义方法
  eat() {}
}
表达式形式(了解即可)
const MyPerson = class Person {
  constructor() {
    console.log("执行构造方法 !");
  }
  eat() {}
};

// 真正有效的类名为 MyPerson 而非 Person
// new Person();  报错
new MyPerson();

// 所以表达式写法,可以简写如下
const MyPerson = class {
  constructor() {
    console.log("执行构造方法 !");
  }
  eat() {}
};
new MyPerson();
模拟立即执行函数,来模拟立即执行的类(了解即可)
// 回顾,立即执行函数的写法
(function () {
  console.log("foo");
})();
// 类似常规调用执行一个函数 func()

// 立即执行的类(模拟立即执行函数而来)
new (class {
  constructor() {
    console.log("执行构造方法 !");
  }
})();

// 类似执行 new Person()
# 二、Class 类的属性和方法
TIP
深入浅出 Class 实例的属性、静态方法、静态属性,私有属性和方法等
# 1、实例属性
TIP
类的实例对象身上的属性称为实例属性。
直接定义在类内部的最顶层或在
constructor()方法中用this定义的属性
class Person {
  // 实例属性
  age = 33;
  constructor(username, sex) {
    // 实例属性
    this.username = username;
    this.sex = sex;
  }
}

const p = new Person("清心", "女");
console.log(p); // Person {age: 33, username: '清心', sex: '女'}
注:
上面代码中,实例属性age直接定义在类内部,实例属性username和sex定义在constructor()方法里面的this上面。
注意:
上面的实例属性age是实例对象自身的属性,并不是在实例对象的原型上面。
# 2、实例方法(原型方法)
TIP
直接定义在类体中的方法,本质就是定义在类的原型上,供类的所有实例对象共享,即为实例方法(或原型方法)
或在constructor方法中用this定义的方法,为实例方法,但这种方式定义的方法没有办法共享,内存占用过大,通常不用,只做了解。
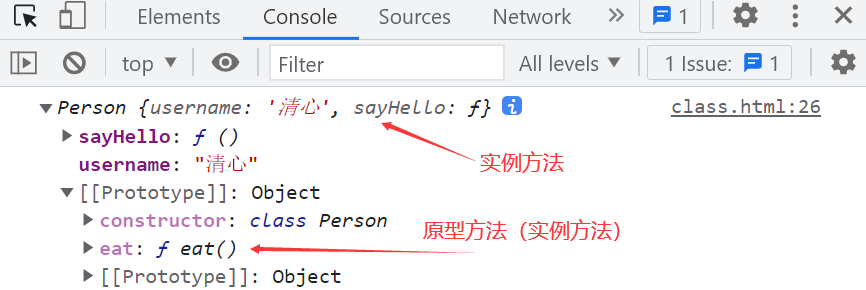
class Person {
  constructor(username) {
    this.username = username;
    // 实例方法-不推荐使用,只做了解
    this.sayHello = function () {
      console.log(`大家好,我是${this.username}`);
    };
  }
  // 原型方法(实例方法)
  eat() {
    console.log(`${this.username}正在吃苹果`);
  }
}

const p = new Person("清心");
console.log(p);
# 3、私有属性
TIP
所谓私有属性是指:只能在类的内部访问的属性,外部不能访问。
即构造函数的内部或原型方法的内部可以访问的属性。
# 3.1、ES5 写法
面试题:
如何用 ES5 实现 ES6 的 class 的 static 和 private(百度)
在 ES6 之前不提供相关私有属性的写法,只能通过变通方式来模拟实现。
| 方法 | 缺点(或优点) |
|---|---|
在属性名前加_来区分 | 这种方式只是人为约定的一种写法,但并不保险 ,在类的外部还是可以访问 |
| 将变量移到构造函数外,利用闭包来实现 | 这种方式所有实例对象操作的是同一个私有属性。本质上不能算是模拟私有变量。(当作了解) |
| 利用 Symbol 值的唯一性,将变量名改为 Symbol 类型 | 相对安全,但是如果非要访问,也是可以在类的外部访问到。比如:getOwnPropertySymbols() 或 Reflect.ownKeys()都可以拿到 |
| 利用 weakMap 来实现 | 非常完美如果有多个私有属性,则要把所有私有属性绑定到一个对象上。 |
- 在变量名前加
_来区分私有属性和实例属性
这种方式只是人为约定的一种写法,但并不保险 ,在类的外部还是可以调用
function Person(username, age) {
  this._money = 2000; // 模拟私有属性
  this.username = username; // 实例属性(公有属性)
  this.age = age; // 实例属性(公有属性)
}

const p = new Person("清心", 33);
console.log(p._money); // 2000 以下划线形式访问,依然可以访问到

// class类中
class Person {
  constructor(username, age) {
    this._money = 2000;
    this.username = username;
    this.age = age;
  }
}

const p = new Person("清心", 33);
console.log(p._money); // 2000 以下划线形式访问,依然可以访问到
- 将变量移到构造函数外,利用闭包来实现。这种方式所有实例对象操作的是同一个私有属性。
const Person = (function () {
  let _money = 2000; // 模拟私有属性

  function Person(username, age) {
    this.username = username; // 实例属性(公有属性)
    this.age = age; // 实例属性(公有属性)
  }
  Person.prototype.getMoney = function (number) {
    _money -= number;
    console.log(`取出${number}元,账户剩余${_money}元`);
  };
  return Person;
})();

const p1 = new Person("清心", 33);
p1.getMoney(200); // 取出200元,账户剩余1800元
const p2 = new Person("arry", 33);
p2.getMoney(300); // 取出300元,账户剩余1500元
以上
p1和p2本质上操作的都是同一个变量_money。本质上不能算作是实例对象的属性,更像是一个局部变量。
// Person.js文件
// class类中 ,模块化导出
let _money = 2000; // 模拟私有属性
export default class Person {
  constructor(username, age) {
    this.username = username; // 实例属性(公有属性)
    this.age = age; // 实例属性(公有属性)
  }
  getMoney(number) {
    _money -= number;
    console.log(`取出${number}元,账户剩余${_money}元`);
  }
}
<!-- index.html页面 -->
<script type="module">
  import Person from "./Person.js";
  const p1 = new Person("清心", 33);
  p1.getMoney(200); // 取出200元,账户剩余1800元
  const p2 = new Person("arry", 33);
  p2.getMoney(300); // 取出300元,账户剩余1500元
</script>
- 利用 Symbol 值的唯一性,将属性名改为 Symbol 类型
let _money = Symbol("账户"); // 创建Symbol类型
function Person(username, age) {
  this[_money] = 2000; // 模拟私有属性
  this.username = username; // 实例属性(公有属性)
  this.age = age; // 实例属性(公有属性)
}
Person.prototype.getMoney = function (number) {
  this[_money] -= number;
  console.log(`取出${number}元,账户剩余${this[_money]}元`);
};

const p = new Person("清心", 33);
const money = Object.getOwnPropertySymbols(p)[0]; // 获取Symbol属性值
p[money] = 4000; // 修改属性值
p.getMoney(200); // 取出200元,账户剩余3800元
class 类的写法
//  Person.js文件
let _money = Symbol("账户"); // 创建Symbol类型
export default class Person {
  constructor(username, age) {
    this[_money] = 2000; // 模拟私有属性
    this.username = username; // 实例属性(公有属性)
    this.age = age; // 实例属性(公有属性)
  }
  getMoney(number) {
    this[_money] -= number;
    console.log(`取出${number}元,账户剩余${this[_money]}元`);
  }
}
<script type="module">
  import Person from "./Person.js";
  const p = new Person("清心", 33);
  const money = Object.getOwnPropertySymbols(p)[0]; // 获取Symbol属性值
  p[money] = 4000; // 修改属性值
  p.getMoney(200); // 取出200元,账户剩余3800元
</script>
- 利用 WeakMap 来实现
如果有多个私有属性,则要把所有私有属性绑定到一个对象上。对于私有属性有一个统一的管理
const privates = new WeakMap(); // 用来保存私有属性
function Person(username, age) {
  privates.set(this, { _money: 2000 });
  this.username = username; // 实例属性(公有属性)
  this.age = age; // 实例属性(公有属性)
}
Person.prototype.getMoney = function (number) {
  if (privates.has(this)) {
    privates.get(this)._money -= number;
  }
  console.log(`取出${number}元,账户剩余${privates.get(this)._money}元`);
};

const p = new Person("清心", 33);
p.getMoney(200); // 取出200元,账户剩余1800元
# 3.2、ES6 写法
TIP
ES2022 正式为 class 添加了私有属性,其写法是在属性名之前使用#号表示。
私有属性可以先指定初始值,也可以不指定。
class Person {
  #money = 2000; // 私有属性  定义同时赋初始值
  #count; // 私有属性,没有赋初始值
  constructor(username, age) {
    this.username = username; // 实例属性(公有属性)
    this.age = age; // 实例属性(公有属性)
  }
  getMoney(number) {
    // 访问私有属性时,要注意用this打点来访问
    this.#money -= number;
    console.log(`取出${number}元,账户剩余${this.#money}元`);
  }
}

const p = new Person("清心", 33);
p.getMoney(200);
console.log(p);
// console.log(p.#money); // 报错

上面的
#money就是私有属性,只能在类的内部使用(this.#money),如果在类的外部读取或写入私有属性#money,就会报错。
console.log(p.#money); // 报错
p.#money = 300; // 报错
注:
如果读取一个不存在的私有属性,不管在类的内部或外部,都会报错,这一点与实例属性不同。
访问一个不存在的实例属性返回 undefined,写入一个不存在的实例属性,相当于给对象添加一个新属性。
class Person {
  sayHello() {
    console.log(this.#sex); // 报错  访问一个不存在的私有属性
  }
}
# 4、私有方法
TIP
所谓私有方法是指:只能在类的内部访问的方法,外部不能访问。即构造函数的内部或原型方法的内部可以访问的方法。
# 4.1、ES5 的构造函数中模拟私有方法的写法
TIP
在 ES6 之前不提供相关私有方法的写法,只能通过变通方式来模拟实现。
| 方法 | 缺点或优点 |
|---|---|
在方法名前加_来区分 | 这种方式只是人为约定的一种写法,但并不保险 ,在类的外部还是可以调用 |
| 将方法移出构造函数,利用闭包来实现 | 需要用 call 方法,改变函数内部的 this 指向 |
| 利用 Symbol 值的唯一性,将方法名改为 Symbol 类型 | 相对安全,但是如果非要访问,也是可以在类的外部访问到。比如:getOwnPropertySymbols()都可以拿到 |
| 利用 WeakMap 来实现 | 如果有多个私有属性,则要把所有私有属性绑定到一个对象上。 注意用 bind来改变函数内部的 this 指向 |
- 在方法名前加
_来区分
这种方式只是人为约定的一种写法,但并不保险 ,在类的外部还是可以调用
function Foo(x, y) {
  this._x = x;
  this._y = y;
}
// 模拟私有方法
Foo.prototype._sum = function () {
  return this._x + this._y;
};

// 公有方法
Foo.prototype.printSum = function () {
  console.log(this._sum());
};

const foo = new Foo(2, 4);
foo.printSum();
console.log(foo._sum()); // 本质上还是能访问到
- 将方法移出构造函数,利用闭包来实现
const Foo = (function () {
  // 构造函数
  function Foo(x, y) {
    this._x = x;
    this._y = y;
  }

  // 模拟私有方法
  function _sum() {
    return this._x + this._y;
  }

  // 公有方法
  Foo.prototype.printSum = function () {
    console.log(_sum.call(this));
  };
  return Foo;
})();

const foo = new Foo(2, 4);
foo.printSum();
- 利用 Symbol 值的唯一性,将方法名改为 Symbol 类型。
相对安全,但是如果非要访问,也是可以在类的外部访问到。比如:
getOwnPropertySymbols()都可以拿到
const Foo = (function () {
  const s = Symbol();
  // 构造函数
  function Foo(x, y) {
    this._x = x;
    this._y = y;
  }
  // 私有方法   方法名为Symbol类型
  Foo.prototype[s] = function () {
    return this._x + this._y;
  };
  // 公有方法
  Foo.prototype.printSum = function () {
    console.log(this[s]());
  };
  return Foo;
})();

const foo = new Foo(2, 4);
// 获取原型上的Symbol类型的属性
let s = Object.getOwnPropertySymbols(foo.__proto__)[0];
console.log(foo[s]()); // 6
- 利用 WeakMap 来实现
const Foo = (function () {
  let privates = new WeakMap();
  // 构造函数
  function Foo(x, y) {
    this._x = x;
    this._y = y;
    // 特别注意要用bind改变函数内部的this指向
    privates.set(this, _sum.bind(this));
  }
  // 私有方法
  function _sum() {
    return this._x + this._y;
  }
  // 公有方法
  Foo.prototype.printSum = function () {
    console.log(privates.get(this)());
  };
  return Foo;
})();

const foo = new Foo(2, 4);
foo.printSum(); // 6
# 4.2、ES6 写法
TIP
私有方法 ES6 目前不提供,也只能通过变通的方法来模拟实现。可以采取与 ES5 相同的方式来模拟 class 类的私有方法。
提案只规定了,私有属性是在属性名之前加 #,很自然的,也可以用这种方式来编写私有方法。
我们只需要在方法名前添加
#号,就表示这个方法是一个私有方法。
class Foo {
  #x; // 私有属性
  #y; // 私有属性
  constructor(x, y) {
    this.#x = x;
    this.#y = y;
  }
  // 私有方法
  #sum() {
    return this.#x + this.#y;
  }
  // 公有方法
  printSum() {
    console.log(this.#sum());
  }
}
const foo = new Foo(2, 4);
foo.printSum(); // 6
foo.#sum(); // 报错
# 5、静态属性
TIP
静态属性是指 Class 本身的属性,通过 类名.属性名 来设置或访问。
class Person {
  constructor() {
    Person.children++; // 创建一个实例对象,就+1
  }
}
// 静态属性  用来统计实例化对象的个数
Person.children = 0;

const p1 = new Person();
const p2 = new Person();
console.log(Person.children); // 2
新提案提供了类的静态属性,在实例属性的前面添加
static关键字,表示该属性为静态属性
class Person {
  constructor() {
    Person.children++; // 创建一个实例对象,就+1
  }
  // 静态属性  用来统计实例化对象的个数
  static children = 0;
}

const p1 = new Person();
const p2 = new Person();
console.log(Person.children); // 2
新写法,在属性前加
static关键字,更符合相关代码应该放在一起的代码组织原则。所有代码都写在的 class 类的{}的大括号中
# 6、静态方法
TIP
静态方法是指 Class 本身的方法,通过 类名.方法名() 来调用
在一个实例方法的前面添加static关键字,就表示该方法为静态方法,只能通过类来调用
class Person {
  // 静态方法
  static getMoney(number) {
    console.log(`我取了${number}元`);
  }
}
Person.getMoney(200); // 我取了200元
- 静态方法内部的
this指向类本身,而不是实例
class Person {
  static money = 2000; // 静态属性
  money = 1000; // 实例属性
  // 静态方法
  static getMoney(number) {
    // this指向 Person类  this.money 相当于 Person.money
    this.money -= number;
    console.log(`我取了${number}元,目前账户剩余${this.money}元`);
  }
}
Person.getMoney(200); // 我取了200元,目前账户剩余1800元
# 7、静态私有属性和静态私有方法
TIP
在私有属性和私有方法前面,如果加上static关键字,表示这是一个静态的私有属性或私有方法。
静态的私有属性和方法只能在类的内部(实例方法,私有方法、静态方法)中调用,外部调用会报错。
class A {
  static #num = 4; // 静态的私有属性
  // 实列方法
  sum() {
    console.log(A.#num);
  }
  // 静态方法
  static getNum() {
    console.log(this.#num);
  }
}

const a = new A();
a.sum(); // 4
A.getNum(); // 4
console.log(A.#num); // 报错, 类的外部不能调用静态的私有属性
# 8、取值函数和存值函数
TIP
与 ES5 一样,在 “类” 的内部可以使用 get 和 set 关键字来对某个属性设置存值函数和取值函数,拦截该属性的存取行为。
class Foo {
  #count = 0; // 私有属性
  // 取值函数
  get count() {
    return this.#count;
  }
  // 存值函数
  set count(value) {
    if (value < 0) {
      this.#count = 0;
    } else {
      this.#count = value;
    }
  }
}

const foo = new Foo();
foo.count = -3;
console.log(foo.count); // 0
foo.count = 44;
console.log(foo.count); // 44
# 9、将以下构造函数写法改成 ES6 的 class 写法
TIP
如果你能轻松简单的将下面的 ES6 代码转换成 ES5 的构造函数写法,说明你对 class 的基础语法已经掌握了。
class A {
  // 静态私有属性,统计实例化成员个数
  static #num = 0;
  // 构造方法
  constructor(x, y) {
    this.x = x;
    this.y = y;
    A.#num++; // 实例化时,统计数加1
  }
  #count = 5; // 私有属性
  // 取值函数
  get count() {
    return this.#count;
  }
  // 存值函数
  set count(value) {
    // 相当处理省略
    this.#count = value;
  }
  // 私有方法
  #Foo() {
    return 2;
  }
  // 实例方法
  sum() {
    console.log(this.x + this.y);
  }
  // 静态方法
  static children() {
    console.log(this.#num);
  }
  // 实例方法
  bar() {
    console.log(this.#Foo());
  }
}

const a1 = new A(1, 2);
const a2 = new A(2, 3);
A.children(); // 2
a1.sum(); // 3
a2.bar(); // 2
a1.count = 6;
console.log(a1.count); // 6
ES5 的构造函数实现
// 1、先写构造函数
// 2、还原constructor构造方法
// 3、 实例属性和方法
// 4、私有方法 和私有属性
// 5、静态属性和静态方法
// 6、静态的私有属性
// 7、get 和 set函数
const count = Symbol(); // 用来模拟私有属性
//   const num=Symbol();// 用来模拟静态的私有属性
const privates = new WeakMap(); // 模拟私有方法
function A(x, y) {
  this.x = x;
  this.y = y;
  // 操作静态属性,后面再写
  privates.set(A, privates.get(A) + 1);
  // 模拟私有属性
  this[count] = 5;
  // 建立实例化对象与实有方法的映射关系
  privates.set(this, function foo() {
    return 2;
  });

  // 处理get和set函数
  Object.defineProperty(this, "count", {
    get() {
      return this[count];
    },
    set(value) {
      this[count] = value;
    },
  });
}
A.prototype.sum = function () {
  console.log(this.x + this.y);
};

A.prototype.bar = function () {
  console.log(privates.get(this)());
};
// 静态的私有属性
privates.set(A, 0);
//   A[num]=0;
// 静态方法
A.children = function () {
  console.log(privates.get(this));
};

const a1 = new A(1, 2);
const a2 = new A(2, 3);
A.children(); // 2
a1.sum(); // 3
a2.bar(); // 2
a1.count = 6;
console.log(a1.count); // 6
# 10、new.target 属性
TIP
ES6 为 new 命令引用了new.target属性,在构造函数中,返回new 命令所作用的构造函数。
如果构造函数不通过new命令调用,那么new.target会返回undefined,因此这具属性可以确定构造函数是如何调用的。
function Fn() {
  console.log(new.target);
}
const fn = new Fn();
// 如果构造函数,不是以new关键字调用,则抛出错误
function Fn(name) {
  if (new.target === undefined) {
    throw new Error("必须使用new调用Fn");
  }
  this.name = name;
}
const fn = new Fn("icoding");
Fn(); // Uncaught Error: 必须使用new调用Fn
class 内部调用new.target,返回当前 class
class Point {
  constructor() {
    console.log(new.target === Point);
  }
}
const point = new Point(); // true
需要注意的是,子类继承父类时,new.target返回的是子类
// 父类
class Point {
  constructor() {
    console.log(new.target === Point);
    console.log(new.target === ColorPoint);
  }
}

// 子类
class ColorPoint extends Point {
  constructor() {
    super();
  }
}

const point = new Point(); // true false
const colorPoint = new ColorPoint(); // false true
# 11、应用:抽象基类
TIP
有时候可能需要定义这样一个类,它可供其他类继承,但本身不能实例化。我们把这种类称为抽象基类
利用子类继承父类时,new.target会返回子类这个特点,可以写出不能独立使用,而必须继承后才能使用的类,阻止对抽象基类的实例化
// 父类
class Point {
  constructor() {
    if (new.target === Point) {
      throw new Error("本类不能实例化,必需被继承");
    }
  }
}
// 子类
class ColorPoint extends Point {
  constructor() {
    super();
  }
}
const colorPoint = new ColorPoint();
const point = new Point(); // Uncaught Error: 本类不能实例化,必需被继承
# 12、静态块
TIP
通过前面的学习,我们了解到 Class 的内部,只能声明属性和方法,不能直接书写其它代码块。
class A {
  // console.log(1)  错误写法,不支持直接书写代码块
}
如果其中一个静态属性需要根据别一个静态属性的值来初始化值时,那我们只能写在类的外部,或写在
constructor()方法里面
写在类的外部
class A {
  static rand = (Math.random() * 2) >> 0;
  static str;
  constructor() {}
}

// 静态属性str的值需要根据rand的值来决定
if (A.rand === 1) {
  A.str = "喜欢我";
} else {
  A.str = "不喜欢我";
}

console.log(A.str);
写在类的外部确实可以轻松实现,但是将类的内部逻辑写到外部显然是不理想的。
写在 constructor() 中
class A {
  static rand = (Math.random() * 2) >> 0;
  static str;
  constructor() {
    // 静态属性str的值需要根据rand的值来决定
    if (A.rand === 1) {
      A.str = "喜欢我";
    } else {
      A.str = "不喜欢我";
    }
  }
}
console.log(A.str); // undefined
new A();
console.log(A.str); // 喜欢我
注:
必须要先创建类的实例后,才能成功给静态属性赋值,同时每 new 都要运行一次代码,肯定也是不合理的。
ES6 为了解决这个问题,ES2022 引入了静态块(static block),允许在类的内部设置一个代码块,在类生成时运行且只运行一次。
主要作用就是对静态属性进行初始化。
语法
class A {
  // 静态块
  static {
    // 可以书写任意的代码块
  }
}
class A {
  static rand = (Math.random() * 2) >> 0;
  static str;
  constructor() {}
  // 静态块
  static {
    // 静态属性str的值需要根据rand的值来决定
    if (A.rand === 1) {
      A.str = "喜欢我";
    } else {
      A.str = "不喜欢我";
    }
  }
}
# 12.1、注意事项
TIP
- 静态块只允许访问静态块声明之前的静态属性
- 静态块的内部不能有 return 语句
- 静态块内部可以使用 this,this 指代当前类
- 一个类中,可以有多个静态块
class A {
  static {
    console.log(this === A); // this指向类本身
    console.log(this.count); // 访问不到在静态块之后定义的静态属性
  }
  static {
    console.log("第二个");
    // return  不能使用return,语法错误
  }
  static count = 2;
}
# 12.2、静态块作用
TIP
- 作用一:用来给静态属性初始化赋值
- 作用二:将私有属性与类的外部代码分享
以下代码演示,如何将私有属性与类的外部代码分享
let getMoney;
class Person {
  #money = 2000;
  static {
    getMoney = (obj) => obj.#money;
  }
}
const p = new Person();
console.log(getMoney(p)); // 2000
# 三、ES5 中继承问题及解决方案
TIP
复习 ES5 中的寄生组合继承,了解 ES6 中新增的Object.getPrototypeOf()和Object.setPrototypeOf()两个方法,用这两个方法来解决 ES5 中不能实现静态属性和方法继承问题
# 1、ES5 寄生组合继承
TIP
在学习 class 的继承前,我们先来回顾下,es5 中的 ES5 寄生组合继承
- 实例属性继承:在子类的构造函数中调用父类的构造函数,然后利用
call方法改变父类构造函数中的this指向 - 原型方法继承:以父类的原型对象为原型,创建出一个新的对象,然后将子类的原型指向新创建出来的对象
// 父类  人类
function People(name, age) {
  this.name = name;
  this.age = age;
}

// 子类  学生类
function Student(name, age, scholl, sid) {
  // 继承属性
  People.call(this, name, age);
  this.scholl = scholl;
  this.sid = sid;
}

// 继承方法
var prototype = Object.create(People.prototype);
prototype.constructor = Student;
Student.prototype = prototype;
# 2、ES5 中无法实现静态属性和方法的继承
TIP
在 ES5 中,我们没有办法实现子类继承父类的静态属性和方法。
你可能会认为,要实现Student子类继承People父类的静态属性和方法,只需要添加Student.__proto__=People代码即可。
确实,添加了 Student.__proto__=People 代码后,Student类就可以打点调用People类身上的静态属性和方法了。
具体代码如下:
// 父类  人类
function People() {}
// 静态属性
People.count = 33;
// 静态方法
People.sum = function () {
  console.log("sum方法");
  console.log(this);
};
// 子类  学生类
function Student() {}

// 子类继承父类的静态属性和方法,但__proto__不是JS原生实现的,是各在浏览器厂商具体实现的
// 所以 __proto__不建议在生产环境中使用
Student.__proto__ = People;

console.log(Student.count); // 33
Student.sum(); //  sum方法   Student
注:
但由于__proto__并不是语言本身的特性,而是各大厂商具体实现时添加的私有属性,虽然各大浏览器的 JS 引擎都提供了这个私有属性,但不建议在生产中使用该 属性,避免对环境产生依赖。
所以 ES5 之前本质上是没有办法实现子类继承父类的静态属性和方法的。但是在 ES6 中是可以实现的,因为 ES6 中新增了Object.setPrototypeOf()方法来设置对象的原型。
# 3、Object.getPrototypeOf() 方法
TIP
Object.getPrototypeOf() 是 ES6 新增的方法,用来获取指定对象的原型,即对象.__proto__值,如果没有,则返回 null。
语法
Object.getPrototype(object); // 获取对象object的原型,即object.__proto__的值
const obj = {};
const __proto__ = Object.getPrototypeOf(obj);
console.log(__proto__ === obj.__proto__); // true
console.log(__proto__ === Object.prototype); // true
异常
其参数必须是一个对象,在 ES5 如果参数不是一个对象类型,将抛出 TypeError 异常,在 ES2015 中,参数会被强制转换为一个对象。
// 1被强制转换成 Number{} 包装对象
const __proto__ = Object.getPrototypeOf(1);
console.log(__proto__ === Number.prototype); // true
温馨提示:
以后想要在生产环境下获取对象的原型,请使用Object.getPrototypeOf()方法
# 4、Object.setPrototypeOf() 方法
TIP
Object.setPrototypeOf()是 ES6 新增的方法,用来设置某个对象的原型到别一个对象或 null。返回值为该对象
语法
Object.setPrototypeOf(object, prototype);
// 相当于 object.__proto__=prototype
// object 要设置其原型的对象
// prototype 为 object对象的新原型
// 返回值 object
const obj1 = {
  a: 1,
  b: 2,
};
const obj2 = {
  c: 3,
};
Object.setPrototypeOf(obj2, obj1); // 相当于obj2.__proto__=obj1
console.log(obj2.__proto__ === obj1); // true
console.log(obj2.a); // 1
以上代码中
Object.setPrototypeOf(obj2, obj1)相当于obj2.__proto__=obj1
所以obj2.a可以通过原型链查找到obj1上,在obj1上找到了属性a,所以返回结果为1
异常
- 如果
setPrototypeOf(obj,prototype)的参数 obj,不是一个可以修改原型的特异对象,如Object.prototype或window,则会抛出异常 - 如果参数 prototype 不是对象或 null,也会抛出异常
// window对象是浏览器的实例,其原型不允许更改
Object.setPrototypeOf(window, {}); // 抛出错误

// Object原型的原型指向原型链的终点,为null
console.log(Object.prototype.__proto__); // null
Object.setPrototypeOf(Object.prototype, null); // 这里不算更改,本身就是null
Object.setPrototypeOf(Object.prototype, {}); // 抛出错误
温馨提示:
以后想要在生产环境更改或设置对象原型,请使用Object.setPrototypeOf()方法
# 5、构造函数之间实现静态属性和方法继承
TIP
ES6 中提供的Object.setPrototypeOf()方法,要实现构造函数之间静态属性和方法的共享,就变得非常简单了。
具体代码如下:
// 父类
function Person() {}
// 静态属性
Person.count = 3;
// 静态方法
Person.sum = function () {
  console.log(this);
};

// 子类
function Student() {}

// Student子类继承父类Person的静态属性和方法
Object.setPrototypeOf(Student, Person); // 相当于 Student.__proto__=Person

// 访问静态属性和方法
console.log(Student.count); // 3
Student.sum(); //  ƒ Student() {}
# 四、Class 的继承
TIP
深入浅出 Class 继承,extends、super 关键字 等
# 1、extends 继承
TIP
Class 可以通过extends关键字实现继承,让子类继承父类的属性和方法。extends 的写法比 ES5 的原型链继承,要清晰和方便很多。
// 人类
class Person {}
// 学生类 继承 人类
class Student extends Person {}
上面示例中
Person是父类,Student是子类,它通过extends关键字,继承Person父类的所有属性和方法。
// 人类
class Person {
  constructor(username, age, sex) {
    this.username = username;
    this.age = age;
    this.sex = sex;
  }
  sayHello() {
    console.log(
      `大家好,我是${this.username},性别${this.sex},今年${this.age}岁了`
    );
  }
}
// 学生类 继承人类
class Student extends Person {
  constructor(username, age, sex, studentId, school) {
    super(username, age, sex);
    this.studentId = studentId;
    this.school = school;
  }
  exam() {
    console.log(`${this.username}正在考试`);
  }
}

const xiaoming = new Student("小明", 15, "男", "sc122", "高新一中");
xiaoming.sayHello(); // 大家好,我是小明,性别男,今年15岁了
xiaoming.exam(); // 小明正在考试
上面代码中
Person是父类,Student是子类,它通过extends关键字,继承Person父类的username,age,sex属性,继承了Person父类的sayHello方法。
上面constructor方法中调用了super(),super在这里表示父为在的构造函数,用来新建一个父类的实例对象。
ES6 规定,子类必须在constructor方 法中调用super(),否则就会报错。
这里因为子类自己的this对象,必须先通过父类的构造函数完成塑造,得到与父类同样的实例属性和方法,然后再对其进行加工,添加子类自己的实例属性和方法。
如果不调用
super()方法,子类就得不到自己的this对象
// 人类
class Person {}
// 学生类 继承人类
class Student extends Person {
  constructor() {}
}
const xiaoming = new Student(); // 报错
上面代码中
Student 类继承了父类,但它的constructor()构造函数中没有调用 super(),导致新建实例时报错。
为什么子类的构造函数中一定要调用 super()
TIP
ES6 的继承机制,是先将父类的属性和方法,添加到一个空的对象上面,然后将该对象作为子类的实例,即 “继承在前,实例在后”。
这就是为什么 ES6 的继承必须先调用
super()方法,因为这一步会生成一个继承父类的this对象,没有这一步无法继承父类。
这一点与 ES5 的继承完全不一样,ES5 中关于属性和方法的继承:
- 属性继承: 在子类的构造函数中调用父类的构造函数,然后利用
call方法改变父类构造函数中的this指向,是“实例在前,继承在后” - 方法继承: 以父类的原型对象为原型,创建出一个新的对象,然后将子类的原型指向新创建出来的对象
// 人类
class Person {
  constructor(username) {
    this.username = username;
    // new Student() 时,这里的this指向new Student()创建的实例对象
    console.log(this); // Student {username: '小明'}
  }
}
// 学生类 继承人类
class Student extends Person {
  constructor(username, studentId) {
    super(username);
    this.studentId = studentId; // Student {username: '小明', studentId: 'sc0001'}
  }
}
const xiaoming = new Student("小明", "sc0001");
console.log(xiaoming);
上面代码中
new Student("小明", "sc0001") 时,会输出Student {username: '小明'}。原因是因为子类的构造函调用super()时,会执行一次父类的构造函数。
子类构造函数中 this 关键字,只能出现在 super()之后
TIP
因为子类实例的构造,必须先完成父类的继承,只有调用super()方法后,得到对应的对象,然后将该对象作为子类的实例,子类构造函数中才会有自己的this。
下面代码中
this.studentId = studentId写在super()之前,则报错。
// 人类
class Person {
  constructor(username) {
    this.username = username;
    console.log(this);
  }
}
// 学生类 继承人类
class Student extends Person {
  constructor(username, studentId) {
    this.studentId = studentId; // 报错
    super(username);
  }
}
const xiaoming = new Student("小明", "sc0001");
console.log(xiaoming);
子类没有定义constructor(),会默认添中,并且里面会自动调用super()
// 计算类
class Compute {
  // 加
  add(x, y) {
    console.log(x + y);
  }
  // 减
  minus(x, y) {
    console.log(x - y);
  }
}

// 计算器类 继承 计算类  获得计算类原型上的方法
class Calculator extends Compute {}

const calculator = new Calculator();
calculator.add(1, 2); // 3
calculator.minus(1, 2); // -1
注:
上面的Calculator继承Compute类,其内部并没有定义constructor()方法,在创建Calculator类的实例时,会默认添加,并且里面会自动调用super()
# 2、私有属性和私有方法的继承
TIP
父类的私有属性和方法不能被继承。
// 超类(父类)
class SuperType {
  #count = 20; // 私有属性
  // 私有方法
  #sum() {
    console.log("私有方法sum");
  }
}

// 子类
class SubType extends SuperType {
  constructor() {
    super();
    this.#sum(); // 报错
  }
  getCount() {
    console.log(this.#count); // 报错
  }
}
上面代码中
子类SubType调用父类的SuperType的私有属性和方法,都报错
如果在父类的实例方法中读写了私有属性,则子类可以通过这些方法,读写私有属性
// 超类(父类)
class SuperType {
#count = 20; // 私有属性
// 私有方法
#sum() {
console.log("父类私有方法sum");
}
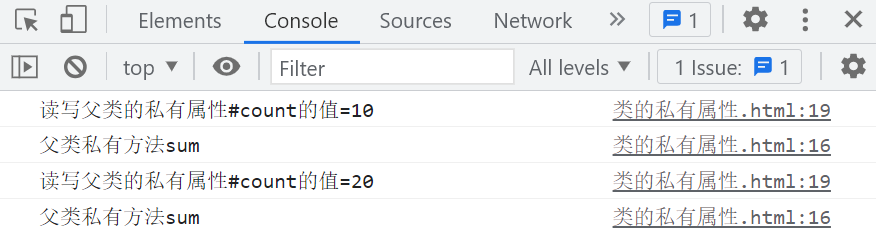
getCount() {
console.log(`读写父类的私有属性#count的值=${this.#count}`);
this.#sum();
}
setCount(value) {
this.#count = value;
}
}
// 子类
class SubType extends SuperType {}
const sub1 = new SubType();
const sub2 = new SubType();
sub1.setCount(10); // 修改私有属性的值
sub2.setCount(20); // 修改私有属性的值
sub1.getCount(); // 获取私有属性的值
sub2.getCount(); // 获取私有属性的值
# 3、静态与实例(属性和方法)的继承
TIP
父类的所有属性和方法(公有,静态)都会被子类继承,除了私有属性和私有方法不能被继承。
// 超类(父类)
class SuperType {
  constructor(x, y) {
    this.x = x;
    this.y = y;
  }
  // 实例方法
  point() {
    console.log(`(${this.x},${this.y})`);
  }

  static num = 0; // 静态属性
  // 静态方法
  static getInfo() {
    console.log("父类静态方法getInfo");
  }
}

// 子类
class SubType extends SuperType {}
const sub = new SubType(1, 2);
console.log(sub);
sub.point(); // 调用实例方法

SubType.num = 3; // 操作静态属性
SubType.getInfo(); // 调用静态方法
// 静态属性的继承是通过浅浅拷贝实现,所以要特别注意静态属性值如果是引用类型的情况
console.log(SubType.num); // 3
console.log(SuperType.num); // 0
注意:
静态属性的继承,是通过浅拷贝实现的。
所以要特别注意静态属性值是引用类型的情况
// 超类(父类)
class SuperType {
  static arr = [1, 2, 3];
}

// 子类
class SubType extends SuperType {}
// 因为静态属性的继承是通过浅拷贝实现的,所以这里操作子类的静态属性arr时,相当于是在操作父类的静态属性arr
SubType.arr.push(4);
console.log(SubType.arr); // [1, 2, 3, 4]
console.log(SuperType.arr); // [1, 2, 3, 4]
# 4、类的 prototype 属性和__proto__属性
TIP
class 作为构造函数的语法糖,同时有prototype和__proto__属性,因此同时存在两条继承链
- 子类的
__proto__属性表示构造函数的继承(继承父类的静态方法和属性),总是指向父类 - 子类的
prototype属性的__proto__属性表示方法的继承,总是指向父类的prototype属性
class A {}
class B extends A {}
// 这里把B和A当成对象处理,B打点调用属性时,沿着原型链到A上面找
console.log(B.__proto__ === A);
// B的实例打点调用方法时,沿着原型链一直找到A.prototype上。
// 这里相当于 B.prototype=Object.create(A.prototype)
console.log(B.prototype.__proto__ === A.prototype);
造成以上两条继承链的本质是因为 Class 类的继承是按照下面的模式来实现的
// 父类
class A {
  // 静态属性
  static count = 3;
  // 静态方法
  static foo() {
    console.log("静态方法foo");
  }
  // 实例方法
  bar() {
    console.log("实例方法bar");
  }
}
// 子类
class B {}

// B子类 继承 A父类原型上的方法和属性
Object.setPrototypeOf(B.prototype, A.prototype);
// B子类,继承 A类的静态方法和属性
Object.setPrototypeOf(B, A);

const b = new B(1, 2);
b.bar(); // 实例方法bar
console.log(B.count); // 3
B.foo(); // 静态方法foo
# 5、总结 class 属性与方法的继承
TIP
class 子类继承父类,主要通过以下三条路径来实现
- 实例方法(原型方法):设置子类的 prototype 属性的原型指向父类的原型,来继承父类原型上的方法和属性
// subType为子类,superType为父类
Object.setPrototypeOf(SubType.prototype, SuperType.prototype);
// 上面代码,相当于 SubType.prototype.__proto__=SuperType.prototype
- 静态属性和方法:设置子类的原型指向父类,来继承父类的静态方法和属性
// subType为子类,superType为父类
Object.setPrototype(SubType, Super);
// 上面代码,相当于 SubType.__proto__=Super
- 实例属性:在子类的构造函数中,调用 super() 方法,来继承父类实例的属性
// 父类
class SuperType {
  constructor(x, y) {}
}
// 子类
class SubType extends SuperType {
  constructor(x, y) {
    super(x, y);
  }
}
注:
在子类的构造函数中调用super()方法,相当于调用父类 SuperType 的构造函数,即 A.prototype.constructor.call(this)。
但是,真实情况是先调用super(),在 super 内部会创建一个对象,然后添加父类的实例属性,最后将这个对象返回,作为子类的 this(实例对象),最后添加子类实例属性。
# 6、判断一个类是否继承另一个类
TIP
如果Object.getPrototypeOf(类1) === 类2,则说明类 1 继承 类 2
// 超类(父类)
class SuperType {
  static arr = [1, 2, 3];
}

// 子类
class SubType extends SuperType {}

console.log(Object.getPrototypeOf(SubType) === SuperType);
重点:
因些,可以使用Object.getprototypeOf()这个方法判断,一个类是否继承了另一个类
# 7、super 关键字
TIP
super这个关键字只能在子类中使用,既可以当作函数使用,也可以当作对象使用。在这两种情况下,它的用法完全不同。
我们来看下 super 的以下几个应用场景,super 分别代表什么
| 场景一 | 说明 |
|---|---|
| super 作为函数调用 | super在子类的constructor()中作为函数调用,代表父类的构造函数,内部this指向子类的实例对象 |
| super 在子类的实例方法中作为对象使用 | super在实例方法中作为对象使用,代表父类的原型对象,用super调用的方法,内部的this指向当前子类实例。如果用 super 对属性赋值,super 代表子类实例对象,如果用 super 读取属性值,super 表示父类的原型对象,则读取子类实例属性返回 undefined; |
| super 在静态方法中作为对象使用 | super 在静态方法中,如果用super读取属性值,则super表示父类本身,如果用super来设置某个属性,super表示子类本身。在子类的静态方法中通过 super 调用父类的方法时,方法内部的 this 指向当前的子类,而不是子类的实例。 |
# 7.1 、super 作为函数调用
TIP
super在子类的constructor()中作为函数调用,代表父类的构造函数。
但其内部
this指向子类的实例对象。
// 父类
class A {
  constructor(x, y) {
    this.x = x;
    this.y = y;
    console.log(this);
    console.log(`(${this.x},${this.y})`);
  }
}
// B 子类
class B extends A {
  constructor(x, y) {
    super(x, y);
  }
}
const b = new B(1, 2);
上面代码
执行new B(1,2)时,就会执行 B 类constructor中的super() 方法。
此时super代表父类的构造函数,但内部的this指向B类的实例对象,相当于在 B 类的constructor方法中执行 A.prototype.constructor.call(this),这里只是类比,目的为了方便理解。
因为实际 B 类的this是需要通过调用 super 后才能得到。
不过要特别注意下面这种特殊情况
// 父类
class A {
  name = "A";
  constructor(name) {
    console.log(this.name);
  }
}
// B 子类
class B extends A {
  constructor() {
    super();
    this.name = "B";
  }
}
const b = new B();
console.log(b);

上面代码中
B 类的constructor()中的super代表父类的构造函数,返回子类的 this(实例对象)。不过由于super()在子类构造方法中执行时,子类的属性还没有绑定到this。
所以如果存在同名的属性,此时拿到的是父类的属性。即(new B()时,打印结果为 'A')
注意:
作为函数调用时,super()只能用在子类的构造函数中,其他地方都会报错
// 父类
class A {}
// B 子类
class B extends A {
  foo() {
    super(); // 报错
  }
}
const b = new B();
# 7.2、super 在子类的实例方法作为对象时
TIP
super在子类的实例方法中作为对象使用,代表父类的原型对象。
所以 super 是没有办法访问实例对象自身的属性和方法。
不过有一点要值得注意的时,这种情况下用super调用的方法,内部的this指向当前子类实例。
// 父类
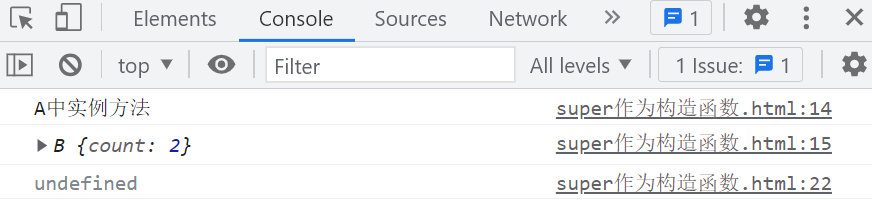
class A {
count = 2;
foo() {
console.log("A中实例方法");
console.log(this);
}
}
class B extends A {
bar() {
super.foo(); // super为父类的原型对象,能访问到原型上的方法
console.log(super.count); // 访问不到实例对象上的属性
}
}
const b = new B();
b.bar();
上面代码
B 类 bar方法中的super = A.prototype ,再加上foo方法内部的this指向B类的实例对象。
所以
super.foo()等同于A.prototype.foo.call(this)
super 对属性赋值和取值
如果用super对某个属性赋值,这里的super指代的就是 this(B 类的实例对象),所以赋值的属性会变成子类的实例属性。
但是如果用
super来访问某个属性时,他指代的是父类的原型对象,只能访问原型上的属性,不能访问实例对象处身的属性。
// 父类
class A {}
// 子类
class B extends A {
  bar() {
    super.x = 3; // super表示this 实例对象
    console.log(super.x); // super表示父类的原型对象,原型上没有这个属性,返回值为undefined
  }
}

const b = new B();
b.bar(); // undefined
console.log(b.x); // 3
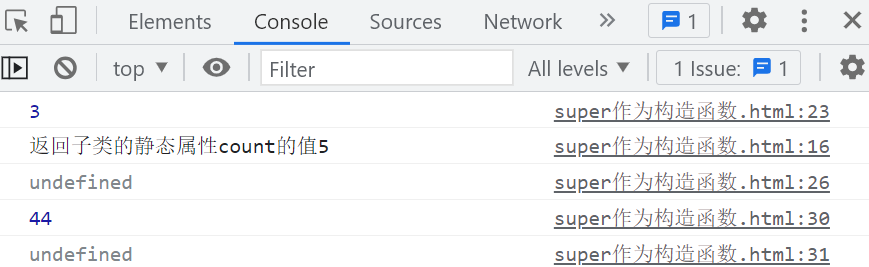
# 7.3、super 在子类的静态方法中,作为对象时
TIP
super 在静态方法中,如果用 super 读取属性值,则 super 表示父类本身,如果用 super 来设置某个属性,super 表示子类本身。
在子类的静态方法中通过 super 调用父类的方法时,方法内部的 this 指向当前的子类,而不是子类的实例。
// 父类
class A {
  static count = 3; // 静态属性
  static foo() {
    // this表示子类,所以${this.count} 结果为 5
    console.log(`返回子类的静态属性count的值${this.count}`);
  }
}
// 子类
class B extends A {
  // 静态属性
  static count = 5;
  // 静态方法
  static bar() {
    console.log(super.count); // 3   super表示父类
    super.foo(); // super表示父类,其foo()中的this表示子类
    super.num = 44; // super表示子类,成功给子类添加静态属性num
    console.log(super.num); // super表示父类,所以返回值为undefined
  }
}
B.bar();
console.log(B.num);
console.log(A.num);
# 7.4 、super 注意事项
TIP
使用 super 的时候,必须显式指定是作为函数,还是作为对象使用,否则会报错。
// 父类
class A {}
// 子类
class B extends A {
    constructor(){
        console.log(super) // 报错,因为super不知道是作为对象还是作为函数来使用
    }
}
// 父类
class A {}

// 子类
class B extends A {
  constructor() {
    super(); // super作为函数使用
    // super作为对象使用,其valueOf内部的this指向B的实例对象,所以结果为true
    console.log(super.valueOf() instanceof B); // true
  }
}
new B();
# 8、extends 的继承目标
TIP
extends 关键字后面的值只要是一个有 prototype 属性的函数就可以实现继承。
了解即可
class B extends A {}
上面的 A 只要是一个只要是一个有 prototype 属性的函数就可以
function fn() {}
fn.count = 2;
class B extends fn {}
console.log(new B());
console.log(B.count);
# 9、原生构造函数的继承
TIP
原生构造函数是指语言内置的构造函数,主要用来生成数据结构,常见的原生构造函数大致有:
- 三大包装对象:
Boolean()、Number()、String() - 数组:
Array() - 日期:
Date() - 函数:
Function() - 对象:
Object() - 正则:
RegExp() - 错误处理相关:
Error()、TypeError()、SyntaxError()、ReferenceError()、RangeError()、URIError()、 Map()和Set()
.....等
在 ES6 之前,原生构造函数是没有办法被继承的,比如,不能自己定义一个 Array 的子类
function MyArray() {
  Array.apply(this, arguments);
}
// 寄生组合继承
let prototype = Object.create(Array.prototype);
prototype.constructor = MyArray;
MyArray.prototype = prototype;

const arr = new MyArray(1, 2, 3, 4);
console.log(arr); // MyArray {}
上面自定义的 MyArray 继承 Array 失败,有两个原因:
- 子类构造函数先生成自己的 this,this 是一个对象
{},然后再讲该对象作为Array.apply()的第一个参数,来改变 Array 内部的 this 指向。最后子类的 this 还是{}不可能是[] - 其二,通过
Array.apply()方式并不能改变原生构造函数Array()的内部 this 指向。也就从而无法拿到原生构造函数的内部属性。
# 9.1、ES6 实现原生构造函数继承
class MyArray extends Array {
  constructor(...args) {
    super(...args);
  }
}

let arr = new MyArray(1, 2, 3);
console.log(arr); // MyArray(3) [1, 2, 3]
arr.push(4, 5, 6);
console.log(arr);
console.log(arr.length);
以上代码中:
上面 MyArray 类完美的继承了 Array 类,是因为 ES6 是通过super()来完成实例属性的继承。super()调用时,会先新建父类的实例对象this,然后将父类的实例属性绑定到this上,最后用子类的构造函数修饰this,绑定子类的实例属性。
温馨提示:
如果想在原有的构造函数的基础上定义自己的数据结构,可以定义子类来继承原生构造函数。
# 9.2、特别注意
TIP
继承 Object 的子类,不能通过 super()方法向父类 Object 传参。
这是因为 ES6 中规定,如果 Object 不是通过 new Object() 这种形式调用,则会忽略 Object 构造函数的参数。
class NewObj extends Object {
  constructor(...args) {
    super(...args);
  }
}
let obj = new NewObj({ a: 1 });
console.log(obj.a); // undefined ,如果传参成功,是返回结果 1

obj = new Object({ a: 1 });
console.log(obj.a); // 1
# 9.3、应用:创建 Array 子类,添加洗牌算法
class SuperArray extends Array {
  // 洗牌算法
  shuffle() {
    for (let i = this.length - 1; i > 0; i--) {
      const j = Math.floor(Math.random() * (i + 1));
      [this[i], this[j]] = [this[j], this[i]];
    }
  }
}

const arr = new SuperArray(...[1, 2, 3, 4, 5, 6, 7, 8, 9, 10]);
console.log(arr);
arr.shuffle();
console.log(arr);
# 五、构造函数与 Class 类的不同点
TIP
深入浅出构造函数 与 Class 类的不同点
- 构造函数可以直接调用也可以 new 调用,但 class 类只能 new 调用
function Fn() {}
Fn();
class A {}
A(); // 报错
- class 类的内部定义的所有方法都是不可枚举的,而 ES5 中原型上定义的方法,都是可以枚举的
function Fn() {}
Fn.prototype.say = function () {};

class A {
  say() {}
}

for (let key in new Fn()) {
  console.log(key); // say
}

for (let key in new A()) {
  console.log(key); // 啥也没有
}
- class 类不存在变量提升,而 Es5 中的构造函数存在函数声明的提升
new A(); // 报错  因为 class类不存在变量提升
new Fn();

function Fn() {}
class A {}
- class 类的静态方法,可以被子类继承,而 ES5 的继承方式,是没有办法实现这一点,需要借助 ES6 的
Object.setPrototypeOf()来实现。
function A() {}
A.count = 2;
A.say = function () {
  console.log(this);
};
function B() {}

B.__proto__ = A; // 并非原生支持
// ES6实现 Object.setPrototypeOf(B, A);
console.log(B.count);
B.say();
注:
虽然上面的B.__proto__ = A,实现了 B 继承 A 上的静态属性和方法,但是__proto__是各浏览器实现的,并不是 JS 原生支持的。
所以要实现 B 与 A 的继承,需要借助 ES6 的
Object.setPrototypeOf()方法
- 构造函数的方法都有
prototype属性,而 class 类的方法是没有这个属性的
class A {
  say() {}
}
const a = new A();
console.log(a.say.prototype); // undefined

function B() {}
B.prototype.say = function () {};
const b = new B();
console.log(b.say.prototype); // {constructor: ƒ}
- ES5 中没有办法继承原生构造函数,而 ES6 中是可以的。
代码演示看上面
# 六、总结
TIP
总结本章重难点知识,理清思路,把握重难点。并能轻松回答以下问题,说明自己就真正的掌握了。
用于故而知新,快速复习 !
# 1、class 的基本用法
- class 定义一个类,其类名首字母大写,类中需要显示定义
constructor函数。如果省略不写,默认自动添加空的constructor函数。
class A {}
// 或
class A {
  constructor() {}
}
- class 的写法其实就是一个语法糖,本质上也是一个函数,底层还是使用的构造函数的机制。
class A {}
console.log(typeof A); // function
console.log(A.prototype.constructor === A); // true
# 2、class 的属性和方法(实例,静态、私有)
| 属性和方法 | 说明 |
|---|---|
| 实例属性 | 直接写在class体内的最顶部,或定义在constructor的this上 |
| 实例方法 | 直接写在 class 体内 如: 函数名(){} |
| 静态属性和方法 | 在实例属性或方法前加上 static关键字,表示该属性和方法为静态的 |
| 私有属性和私有方法 | 在实例属性或方法前加上 #号,表示该属性和方法为私有的 |
| 静态的私有属性和方法 | 在私有属性或方法前加上 static关键字,表示该 属性和方法是静态私有属性或方法 |
# 3、ES5 模拟私有属性和方法(重点掌握)
| 方法 | 缺点(或优点) |
|---|---|
在属性名前加_来区分 | 这种方式只是人为约定的一种写法,但并不保险 ,在类的外部还是可以访问 |
| 将变量移到构造函数外,利用闭包来实现 | 这种方式所有实例对象操作的是同一个私有属性。本质上不能算是模拟私有变量。(当作了解) |
| 利用 Symbol 值的唯一性,将变量名改为 Symbol 类型 | 相对安全,但是如果非要访问,也是可以在类的外部访问到。比如:getOwnPropertySymbols() 或 Reflect.ownKeys()都可以拿到 |
| 利用 weakMap 来实现 | 非常完美如果有多个私有属性,则要把所有私有属性绑定到一个对象上。 |
# 4、new.target 属性
TIP
new.target 表泵在构造函数中,返回new 命令所作用的构造函数。
作用:
- 常判断
new.target === 构造函数是否成立,来判断当前构造函数是否通过 new 来调用 - 常判断
new.target === 子类是否成立,来保证当前类子能通过继承来使用
# 5、extends 继承
TIP
ES6 中用 extends 来实现类与类之间的继承
class A {} // 父类A
class B extends A {} // 子类B继承父类A
实际上 extends 关键字后面只要是一个有 prototype 属性的构造函数,都可以实现继承。
function A() {}
class B extends A {}
new B();
类与类之间可以实现实例属性、实例方法、静态属性和方法的继承。
# 6、super 关键字
TIP
- super 既可以 作为函数调用,又可以作为对象使用
- 使用 super 的时候,必须显式指定作为函数还是作为对象使用,否则会报错
以下是 super 的不同场景下,所表达的不同含义
| 场景一 | 说明 |
|---|---|
| super 作为函数调用 | super在子类的constructor()中作为函数调用,代表父类的构造函数,内部this指向子类的实例对象 |
| super 在子类的实例方法中作为对象使用 | super在实例方法中作为对象使用,代表父类的原型对象,用super调用的方法,内部的this指向当前子类实例。如果用 super对属性赋值,super代表子类实例对象,如果用 super读取属性值,super表示父类的原型对象,则读取子类实例属性返回undefined; |
| super 在静态方法中作为对象使用 | super 在静态方法中,如果用super读取属性值,则super表示父类本身,如果用super来设置某个属性,super表示子类本身。在子类的静态方法中通过 super 调用父类的方法时,方法内部的 this 指向当前的子类,而不是子类的实例。 |
# 七、测试题
TIP
自我测试:在不看答案的前提下,看看自己是否真正掌握了本节所学内容。
# 1、以下关于类的声明,正确的是 ?
多选
- A、
class A {}
- B、
Class A{}
- C、
class A(){}
- D、
const A = class {};
自己先分析,再点击查看正确答案
正确答案: A 、D
# 2、以下代码中,有几处错误 ?
class A {
  #count = 3;
  constructor(x, y) {
    this.x = x;
    this.y = y;
  }
  static sum() {
    return [this.x, this.y];
  }
  foo() {
    console.log(this.#count);
  }
}

A.foo();
const a = new A(2, 3);
console.log(A.sum()); // 2,3
console.log(a.#count); // 3
- A、1
- B、2
- C、3
- D、4
自己先分析,再点击查看正确答案
正确答案: C
# 4、以下代码的运行结果是 ?
class A {
  color = "red";
  constructor(x, y) {
    this.x = x;
    this.y = y;
  }
  aSay() {
    console.log(this.x);
  }
}

class B extends A {
  constructor(x, y) {
    super();
  }
  bSay() {
    console.log(this.x);
  }
}

const a = new A(1, 2);
const b = new B(4, 5);
a.aSay();
b.bSay();
自己先分析,再点击查看正确答案
正确答案: 1 undefined
# 5、关于 super 关键字,下列说法正确的是 ?
单选
- A、super 作为函数调用时,代表父类的构造函数
- B、super 中的 this 指向的是子类
- C、在静态方法中访问 super,指向父类的原型对象
- D、在非静态方法中访问 super,指向父类
自己先分析,再点击查看正确答案
正确答案: A
# 6、以下代码的运行结果是 ?
class A {
  color = "red";
  constructor(x) {
    this.x = x;
  }
  static aSay() {
    console.log(this.x);
  }
  aShow() {
    console.log(this.color);
  }
}

class B extends A {
  constructor(x) {
    super(x);
  }
  static bSay() {
    super.aSay();
  }
  bShow() {
    super.aShow();
    console.log(super.color);
  }
}

const b = new B(11);
B.bSay();
b.bShow();
自己先分析,再点击查看正确答案
正确答案:undefined red undefined
答案解析:
B.bSay()中的 super 作为对象表示的是 B 的父类,但super.aSay()时,aSay()方法内的this指的是子类 B,所以this.x的结果为 undefined,因为 子类没有静态属性xb.bShow()中的 super 作为对象表示的父类 A 的原型对象,但是super.aShow()时,aShow()中的 this 指的是 B 类的实例 b,所以this.color,表示子类的color属性。因为 B 类继承 A 类,实例属性被继承过来,所以this.color的结果为redsuper.color表示访问 A 类原型上的color属性,因为 A 类原型上没有color属性,所以结果为undefined
大厂最新技术学习分享群

微信扫一扫进群,获取资料
X